


Share the post "Fashionable Free-Time Crafts"
Creating fun fashions that you and your friends can wear is a blast (and super-easy.) All you need are some simple items and free time. You can even give these as unique handmade gifts!
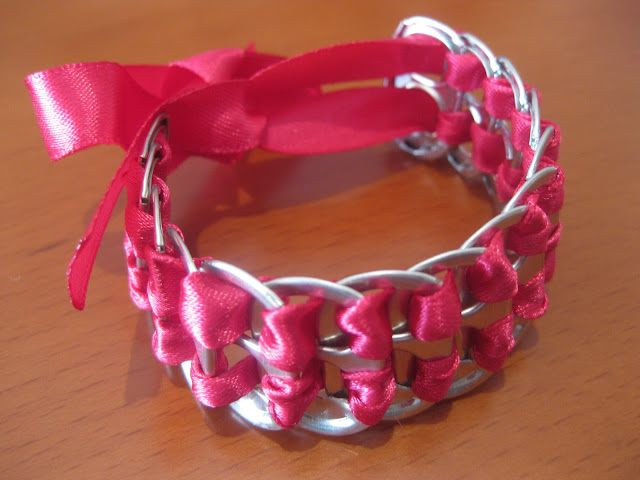
Soda Tab Bracelet
Save those soda can tabs so you can make this eye-catching bracelet!
Materials:
- Soda tabs (enough to fit around your wrist)
- Ribbon (about ¼-½-inch thick)
Instructions:
- Take a soda tab and weave one end of the ribbon through the top hole. Continue for as many tabs as you need to fit around the circumference of your wrist.
- On the last soda tab, after you pull the ribbon through the top hole, weave it through the bottom hole. Continue pulling the ribbon through the bottom holes for the other soda tabs (now the ribbon should be through both holes.)
- Once you reach the final tab (which should be the soda tab you started with,) take both ends of the ribbon and tie them to the other end of the bracelet to connect both ends.
Pistachio Shell Pendant
Do you have pistachio in your weekly ? Everyone will go nuts (pun intended) for this cute pendant necklace.
Materials:
- Pistachio shells (about 34; you may need more or less)
- Cardboard
- Hot glue gun
- Acrylic paint
- Small paintbrush
- Necklace chain
- Jump rings
- Lobster clasp
- Small pliers
- Scissors
Instructions:
- Take the cardboard and cut out a half-moon shape, which will serve as the baseboard of your pendant.
- Hot glue a jump ring to both corners of the flat side of the cardboard. Then link the chain through and attach the lobster clasp.
- Paint the pistachio shells in your desired color. For example, let’s say you choose purple. Paint some of the shells dark purple, then go a shade lighter for a few more, then lighter and lighter. The darkest shade will have the most painted shells. Use a few coats of each color to get a nice, rich tone.
- Allow the shells to dry.
- Hot glue the shells to the cardboard, starting at the curved bottom. Attach a layer of the darkest hue, then continue working your way up to the lightest hue. Allow to dry.
Beautiful Bow Headband
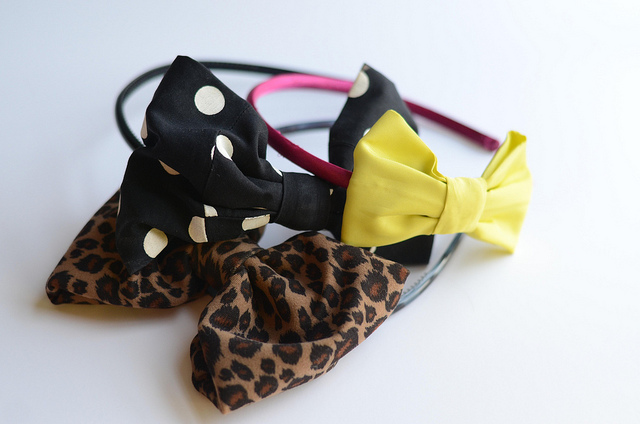
Make this hair accessory in just a few minutes!
Materials:
- Wide, comfort-fit headbands (try a variety pack)
- Fabric scraps (or old clothing)
- Scissors
Instructions:
- Use the scissors to cut out a strip of fabric that is about 2 inches longer than the headband.
- Lay the strip of fabric out flat and horizontally and slide the headband vertically so that the fabric is between the top and bottom of the headband.
- Tie the scrap of fabric into a bow, pulling and arranging to position it nicely on the headband. You can add other materials to your headband, such as fancier ribbons, buttons, or pins!
Share the post "Fashionable Free-Time Crafts"
 EN
EN  RU
RU